This post is the second part of Katello series. In our previous article, we covered the Installation of Katello on CentOS 7 / RHEL 7. Here, in this post, we will configure Katello for providing packages and updates to its clients (we will discuss how to configure clients, later.).
In brief, we will tell Katello to download repositories from upstream (Ex. mirror.centos.org) server and then create activation for registering client servers.
Download Repositories:
Create Organizations:
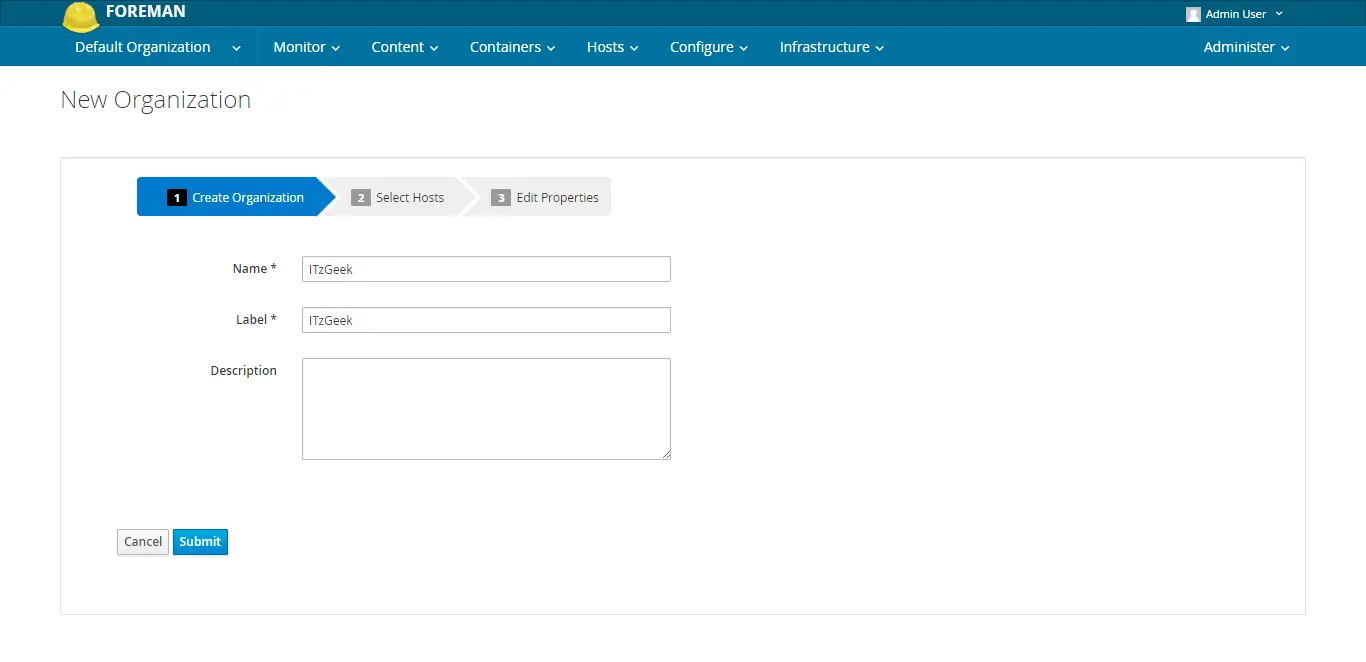
Before downloading the repositories, create an organization in which you will be doing all the activities.
Foreman Dashboard –> Default Organization –> Manage Organizations –> New Organization.
Name your organization and then click on submit.
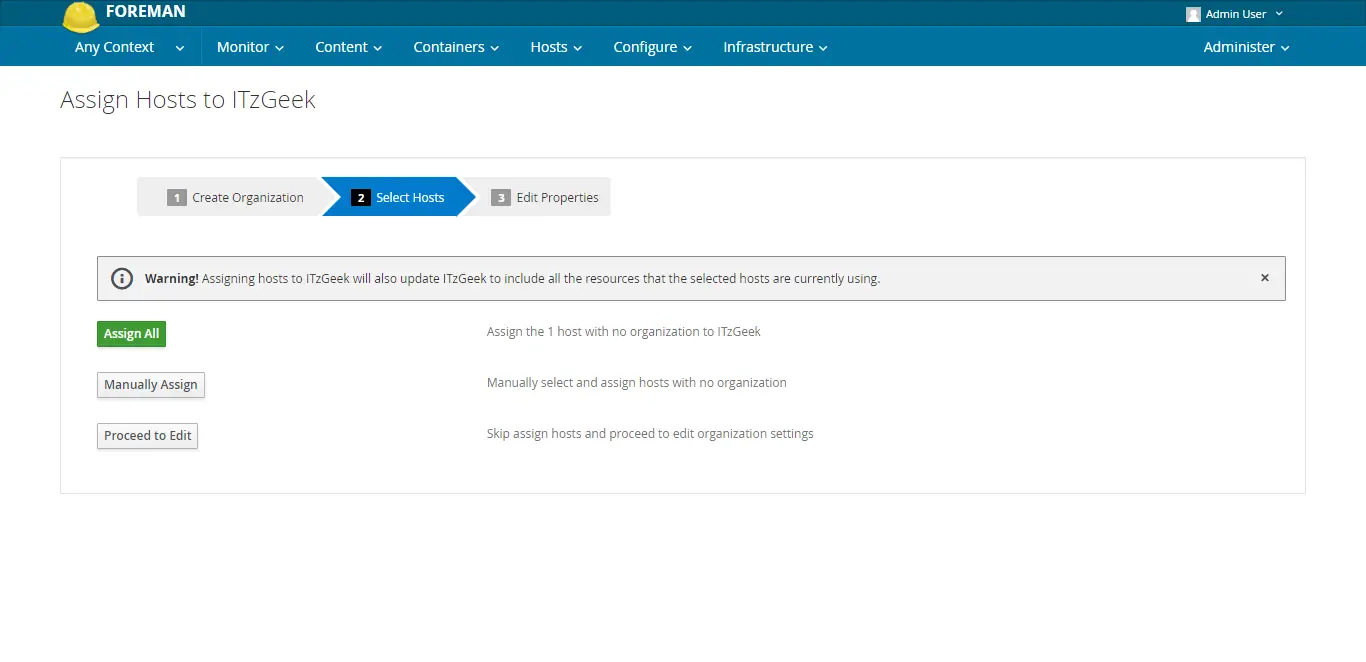
By default, Foreman host (Where Katello installed) is assigned to “no organization“. If you wish to assign the Foreman host to ITzGeek organization; you can do it via “Assign All” or “Manually Assign” option. Here, I will choose to skip by clicking on “Proceed to Edit“.
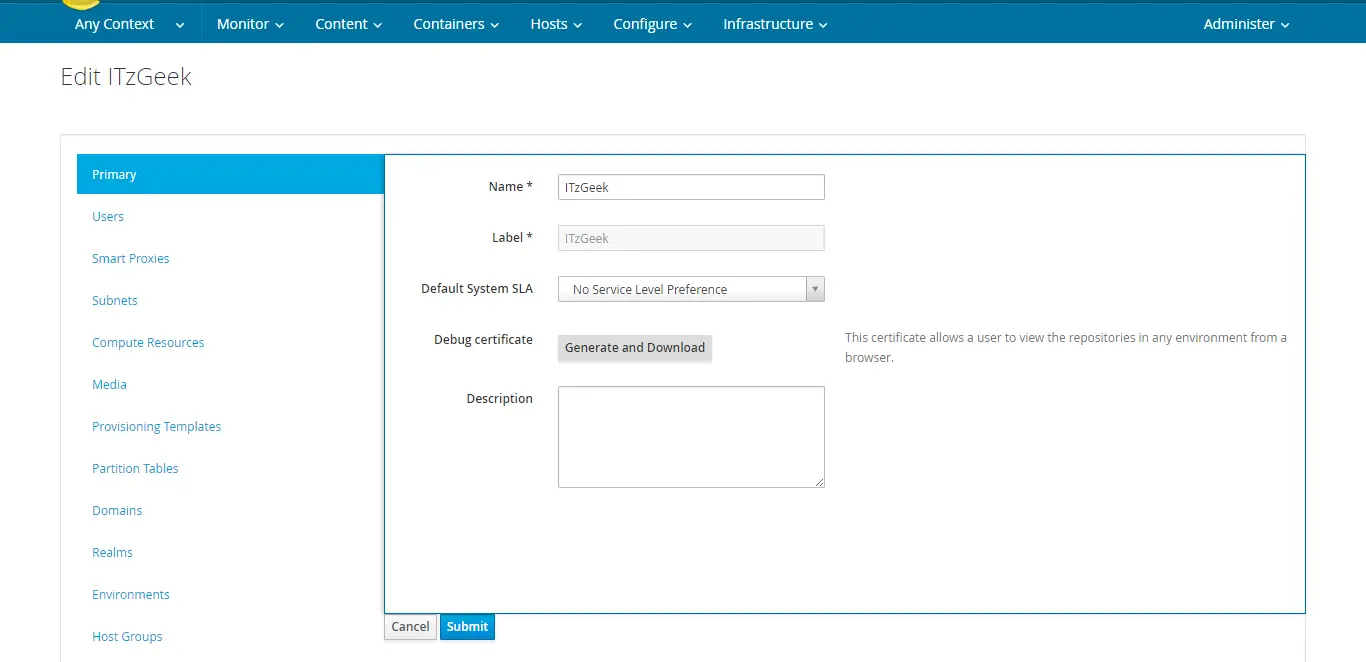
Simply click submit on the final page.
Make sure you are in ITzGeek organization whenever you do any activities.

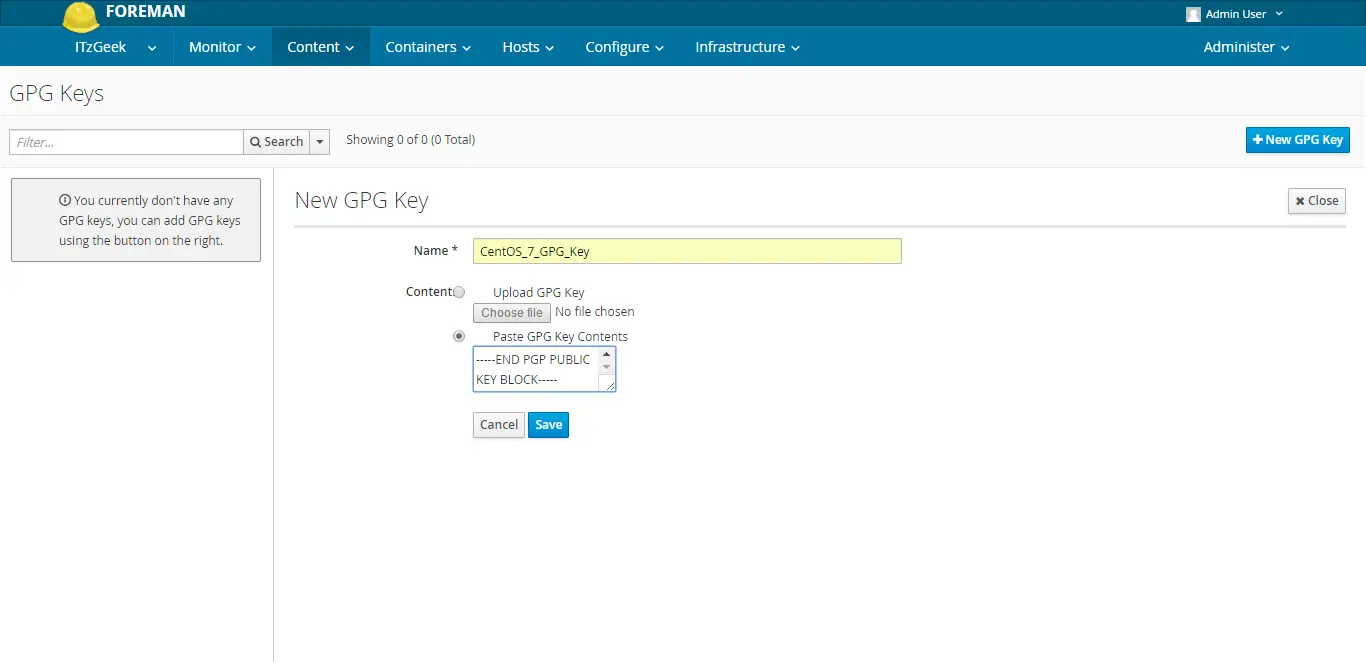
Create GPG Key:
Now, you would need to create a GPG keys to verify the integrity of the upstream repository.
For Ex, to create a GPG key for CentOS 7 repository; go to the following URL and copy the content of the file.
On Foreman, Content –> GPG Keys –> New GPG Key. Enter the name for the GPG Key and then paste the copied content; and finally, click Save.
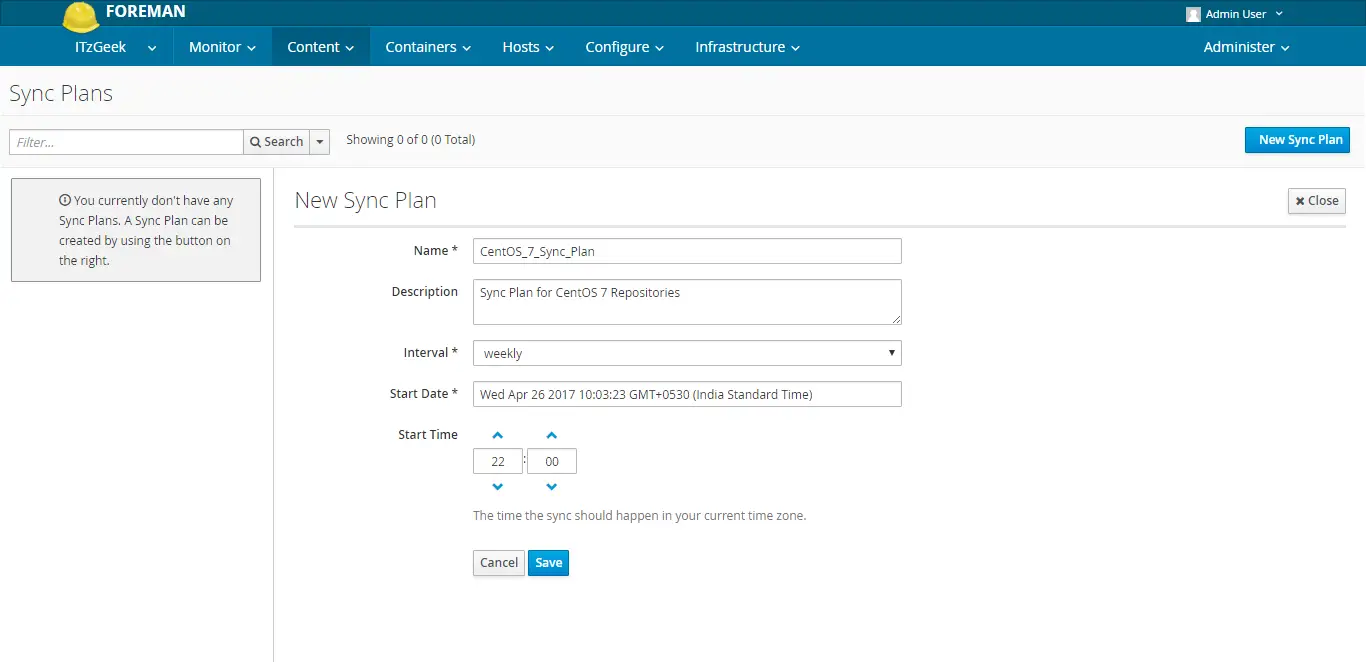
Create Sync Plan:
Let’s create a sync plan for repositories so that they can be synced with upstream servers on a specified interval. Go to Content –> Sync Plans –> New Sync Plan.
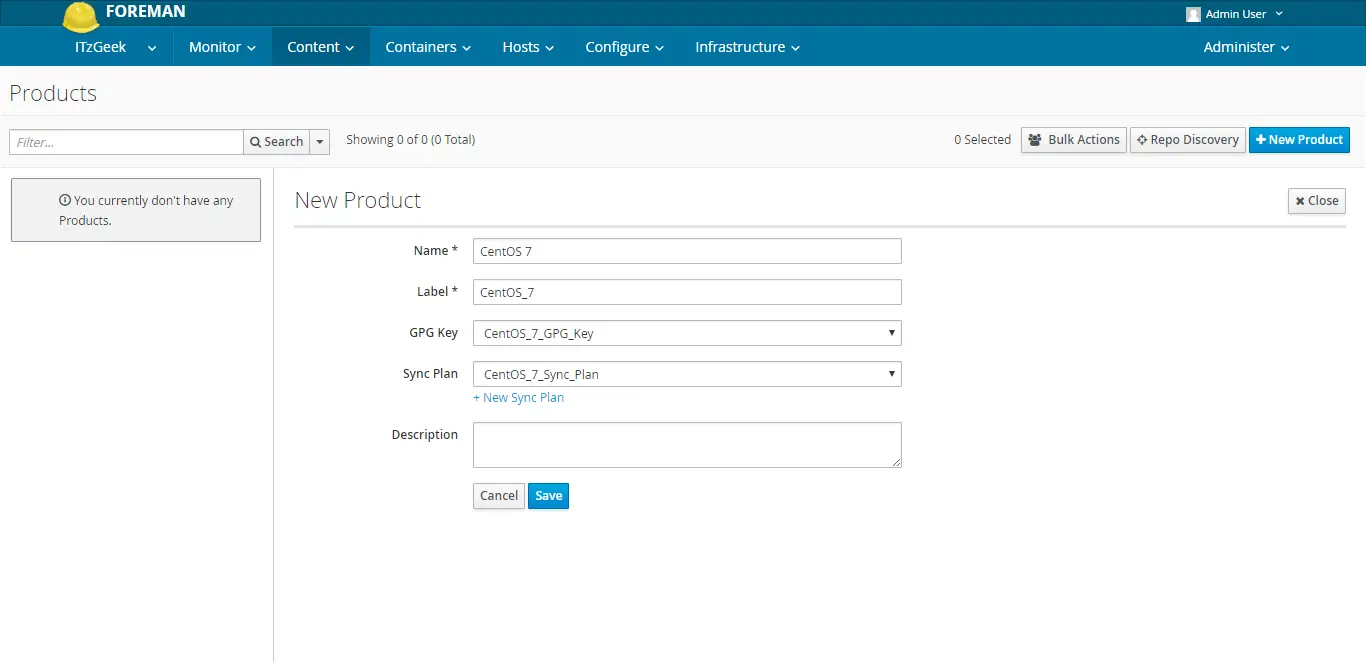
Create Products:
Create a product for CentOS 7 with the following information. Go to Content –> Products –> New Product.
Name : CentOS 7
Label : CentOS_7 (Auto complete based on product name)
GPG Key : CentOS_7_GPG_Key
Sync Plan : CentOS_7_Sync_Plan
Create Repositories:
Create a repository for CentOS 7 base OS by going to Content –> Products –> CentOS 7 (Click on Name) –> Repositories Tab –> Create Repository.
Name : OS_x86_64
Label : OS_x86_64
Type : yum
URL : https://mirror.centos.org/centos-7/7/os/x86_64/
Download Policy : Immediate
GPG Key : CentOS_7_GPG_Key
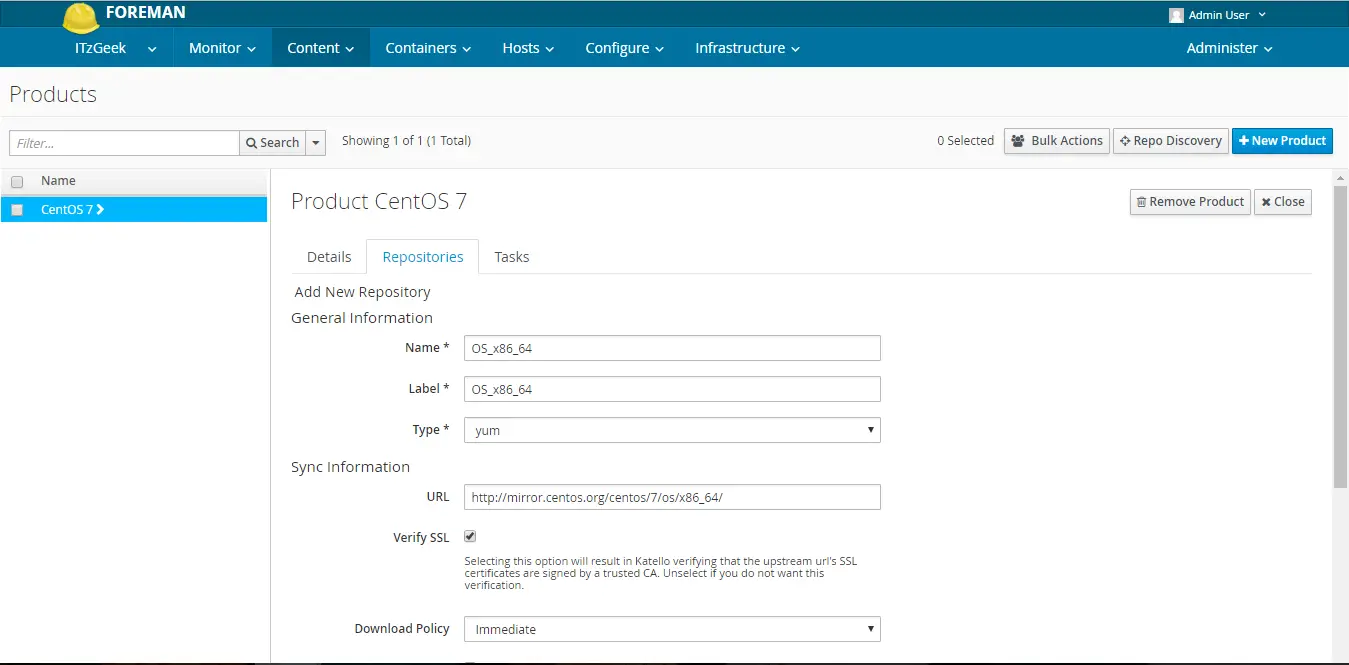
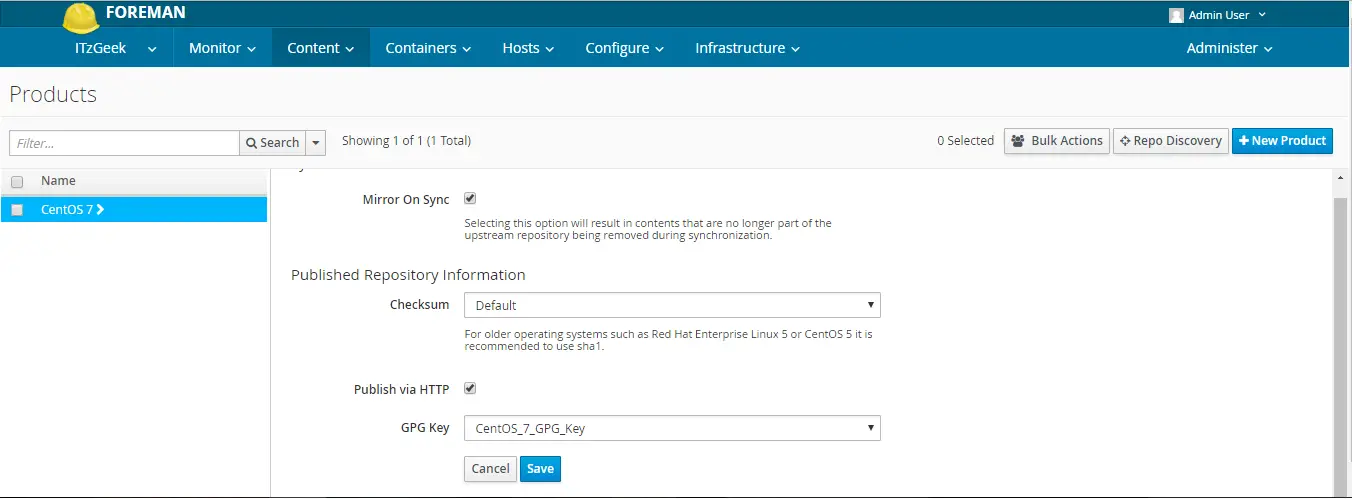
After entering all the details, click Save.
Initiate syncing of the OS_x86_64 repository by going to Content –> Products –> CentOS 7 (Click on Name) –> Repositories Tab –> Select Repository (OS_x86_64) –> Sync Now.
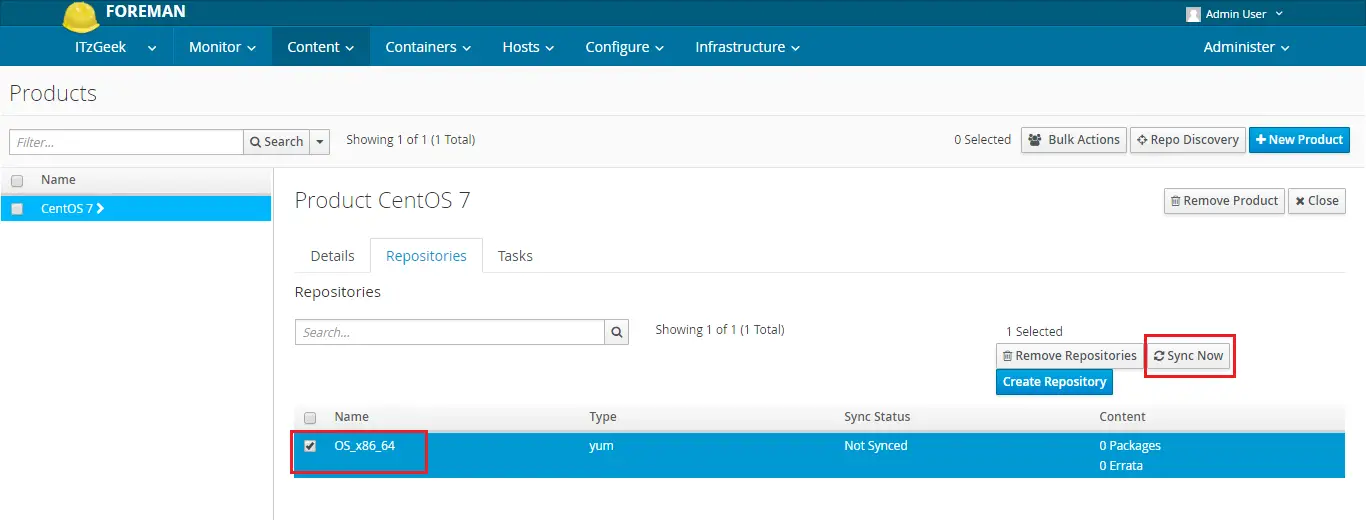
Katello will start the syncing of the OS_x86_64 repository.
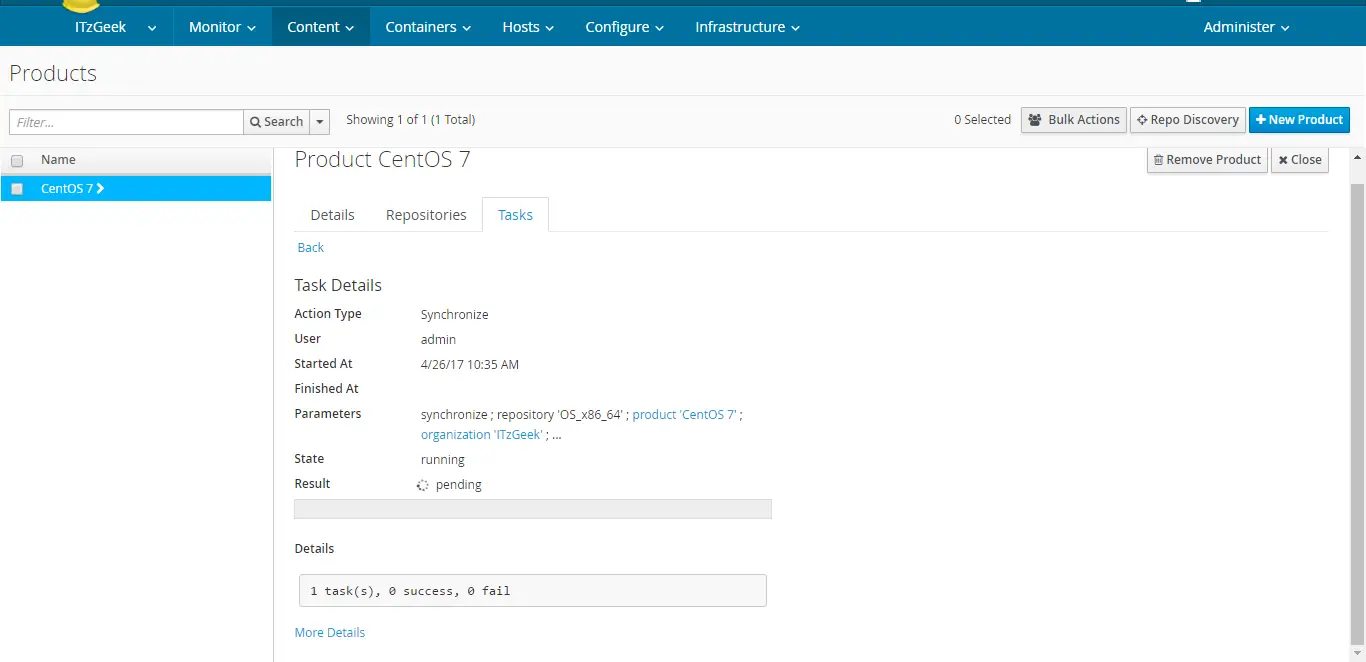
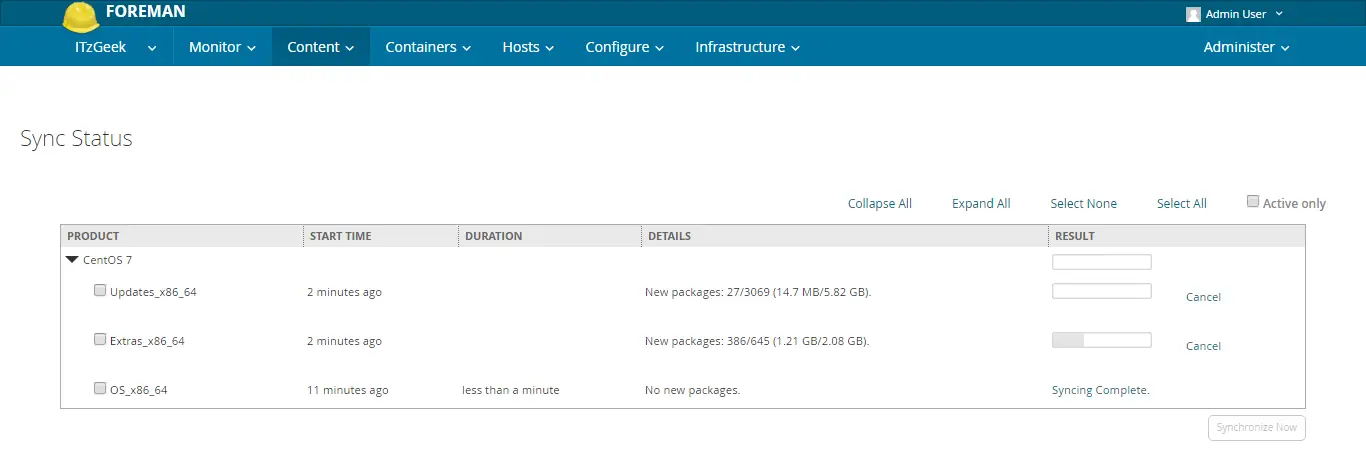
To check the status of Sync, go to Content –> Sync Status.

You would need to wait for this to complete. It may take few minutes or an hour long, depending on your internet speed.
Until that time, you can go and create repositories for
Extras:
Name : Extras_x86_64
Label : Extras_OS_x86_64
Type : yum
URL : https://mirror.centos.org/centos-7/7/extras/x86_64/
Download Policy : Immediate
GPG Key : CentOS_7_GPG_Key
Updates:
Name : Updates_x86_64
Label : Updates_OS_x86_64
Type : yum
URL : https://mirror.centos.org/centos-7/7/updates/x86_64/
Download Policy : Immediate
GPG Key : CentOS_7_GPG_Key
Once you have added the remaining repositories, your product page will look like below. As soon as you created it, start the Synchronization for new packages. From Content –> Products –> CentOS 7 (Click on Name) –> Repositories Tab.
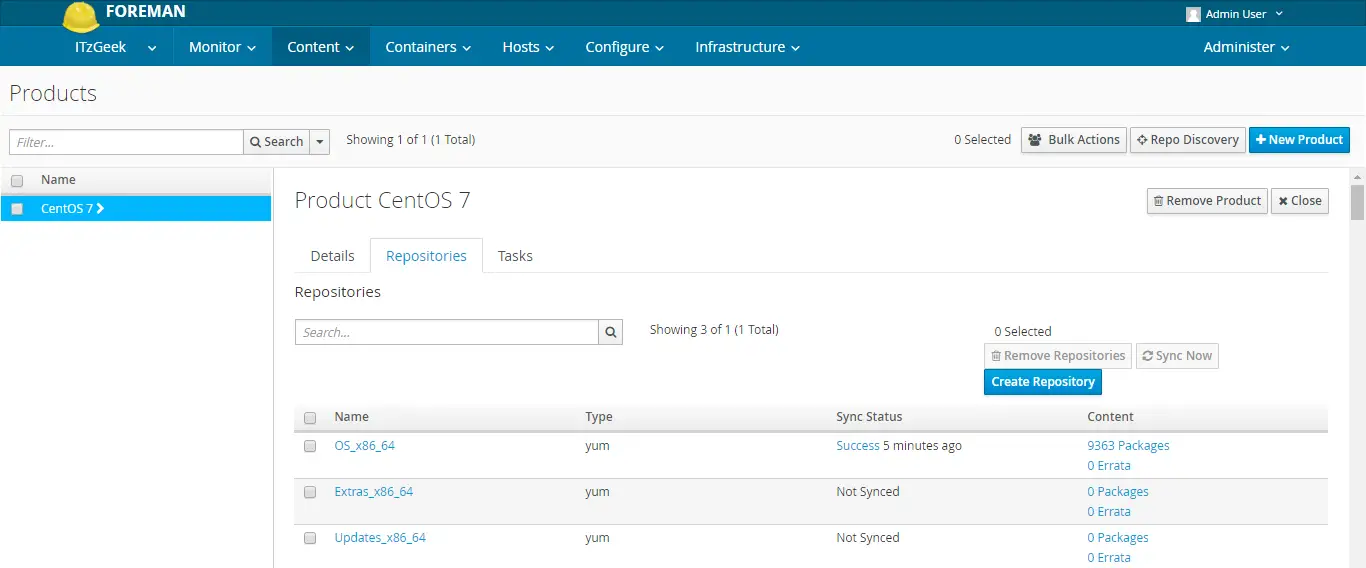
You can check the sync status of your newly created repositories, go to Content –> Sync Status.